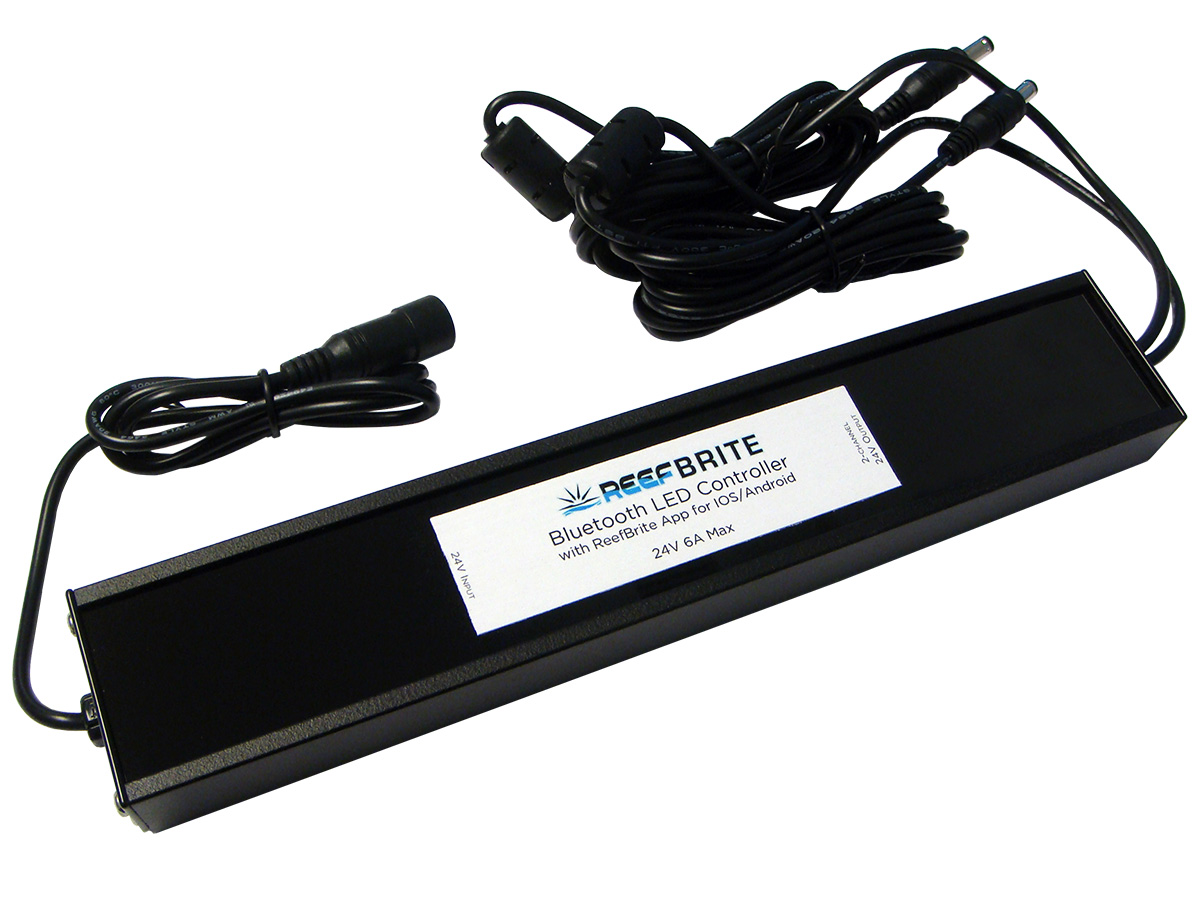
The Reef Brite Bluetooth LE Controller allows complete control of XHO, LumiLite Pro, and LumiLite units. Easy to install, simple to use, the Reef Brite Bluetooth LE Controller has a built in battery and non volatile internal memory so you never have to worry about losing your light settings or reprogramming in the event of power interruptions. Available in standard*, and Controller Plus. *Standard version can be used with your existing Reef Brite power supply that came with your light. Depending on the number of units you want to control, a larger power supply (Sold separately) may be required. Controller Plus version includes upgraded 250 watt power supply. Compatible with Apple or Android devices. The Reef Brite App is available free on Apple or Google Play.
Note: if using our inline dimmer that’s included with LumiLite Pro or purchased separately to control your Reef Brite LED unit you must disconnect the inline dimmer before hooking up your controller.
Quick Start set up:
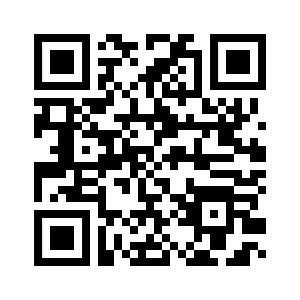
1. You can download the Reef Brite App directly to your device by scanning the QR code below or download it free on the Google or Apple App store.
2. Open App and press CONNECT located on the bottom left of your screen to scan for any controllers within range of your device.
Available controllers (indicated by a series of characters and numbers) will appear on screen.
Note: Once connected you can assign (Name) your controller to a device using up to 7 characters. This is done by holding down on the word device at the bottom of your screen. A keyboard will pop up and you are allowed up to seven characters to name your device. To completely clear the current designated name simply press the space bar 7 times until the name is blank and hit save. You can now assign any 7 characters you like to the device by holding down on device and entering the desired characters or numbers to assign your device. Hit save and you are all set. This allows an infinite number of controllers to be controlled via a single App.
Basic set up:
Press the desired controller displayed to select.
3. Upon opening the App asks you to Sync the clock on your device select YES. This occurs every time you open the App to ensure that the controller is synced to your device and you do not change settings accidentally. Failure to do so can result in the controller not coming on according to your programmed time settings.
4. The first set point will automatically appear once you connect. This set point controls the initial ON setting and cannot be deleted as it is a function of the App.
Select EDIT to set the time you would like your light/lights to come on.
Set each channel to the desired intensity (0-100%) and press SAVE at the bottom of the screen.
It is usually recommended for basic use that the start time be set at 0%. If the start (Or stop) set points are not each at 0% the lights will remain on. This allows the controller to simulate a lunar mode if desired. Note: Failure to click save will result in your settings not being programmed.
5. Press + at the top right of your screen to add the next (Second) set point.
Set the time that you would like your light at its maximum intensity and set the intensity of each channel accordingly (1-100%). Click SAVE
6. Press + again to add the next (Third) set point. Set the time you would like the light to go off and set both channels to 0% intensity. Click SAVE.
At this point the controller will automatically set your On/Off and ramp/dimmer settings. Additional set points may be added for advanced lighting schedules with a maximum of 10 set points allowed.
Using multiple devices: All settings are saved to the controller allowing you to open the App on any device to access or edit your settings. Note: only one device may be connected at a time. If you are having trouble connecting from another device make sure you have disconnected the App on the previous device you were using.
Advanced features
Show Time Chart:
This allows you to see what your light setting will look like over the course of your lighting program.
- Press SHOW TIME CHART, and a graph will appear.
- To test your light settings press Simulation on the bottom of your screen.
An accelerated time version of your program will begin to run. - Once you are done running the simulation click CANCEL and the lights will return to their set program.
Overwrite:
- In the event you want to turn on your lights without changing your light settings select OVERWRITE at the bottom right of your screen.
Set each channel independently to your preferred setting. - When you are done viewing your tank select the Back button and the lights will return to their programmed settings.
Note: To save power on your device the App will time out and close if not in use. If you do not press back or reopen the App and connect the lights will stay on continuously. To turn your lights off open the App and connect and the lights will return to their programmed settings.
Power Outages:
Your controller has its own internal clock and is designed to save your settings so that when power is restored it will automatically resume the programmed time and light settings.
IMPORTANT NOTICE:
When installing any lighting product, power supply, or controller
do not install in a manner that will allow any part or component to come in direct contact with water.
Reef Brite assumes no liability for incorrectly installed products.